Changing a faucet is a relatively simple task that can be completed in about an hour. The necessary tools for the job include a screwdriver, adjustable wrench, and pliers. The first step is to turn off the kitchen water supply to the faucet by turning the shut-off valve.
Then, use the screwdriver to remove the screws that hold the faucet in place. Next, use the adjustable wrench to loosen and remove the nut that holds the faucet in place. Finally, use pliers to remove the old kitchen faucet sink. Putting in a new faucet is simply a reversal of these steps. Be sure to tighten screws and nuts securely to prevent leaks. How to Change Kitchen Faucet.
Why Kitchen Faucets Need To Be Changed

There are a few reasons why kitchen faucets need to be changed. The first reason is that the faucet often becomes clogged with food and grease from dishes. This can cause the water pressure to decrease, which means that it will take longer for the water to come out of the faucet. In addition, it can also cause the faucet to leak. A second reason why kitchen faucets need to be changed is that they often become dirty and stained.
This can be difficult to clean, and it can also make it difficult to see what you are doing while you are cooking. A third reason why kitchen faucets need to be changed is that they often break down. When this happens, it can be difficult or impossible to fix them, which means that you will need to replace them entirely.
What You Will Need To Change Kitchen Faucet
When a kitchen faucet starts to leak, it can be a pain to fix. Often times the problem is not with the faucet itself, but with the connections that attach it to the sink. In order to fix a leaking kitchen faucet, you will need to change at least one of the connections.
For a single-handle faucet, you will need to change the connection between the handle and the spout. Two-handle faucet, you will need to change the connection between both handles and the spout.
The first step is to remove the screw that holds the handle in place. This screw may be hidden under a cap or it may be visible on top of the handle.
Describe The Process Of Changing The Kitchen Faucet

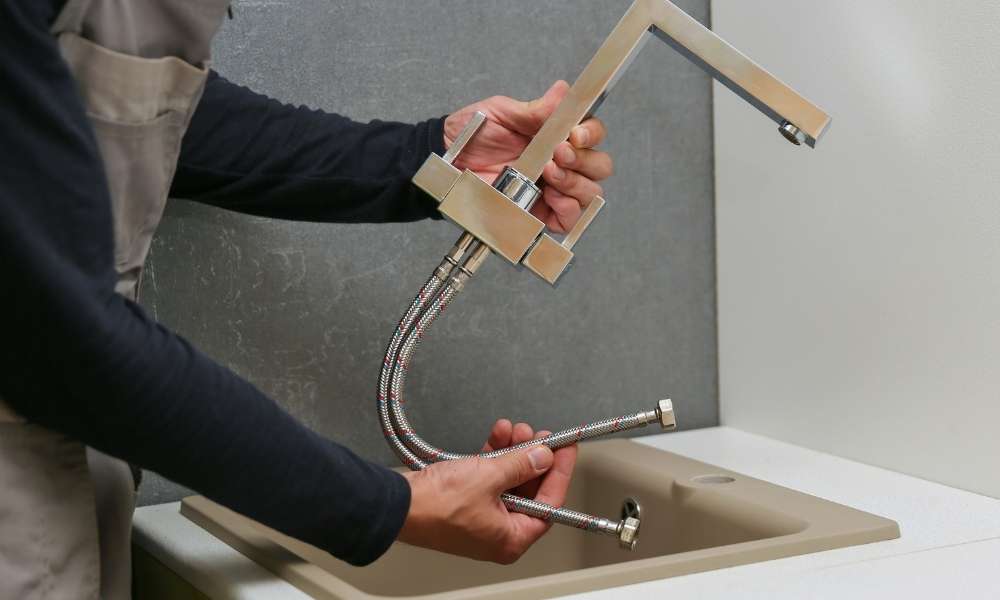
When it’s time to change your kitchen faucet, there are a few simple steps you can take to make the process go smoothly. The first step is to remove the old faucet. This can be done by unscrewing the nuts that hold it in place beneath the sink. Next, disconnect the water supply lines and remove the kitchen faucet sink. If you’re installing a new faucet follow the manufacturer’s instructions for installation. Once the new faucet is in place, reconnect the water supply lines and reattach the nuts that hold it in place. Finally, test to make sure that it’s functioning properly. How to Change Kitchen Faucet.
The next step is to install the new faucet. Most new faucets come with installation instructions, so make sure to read them carefully. There are usually two hoses coming out of the bottom of the faucet – one for hot water and one for cold water.
Turn Off Water Kitchen Faucet

Changing a faucet is not as difficult as one might think. The following are the basic steps one would need to take in order to change out a kitchen faucet.
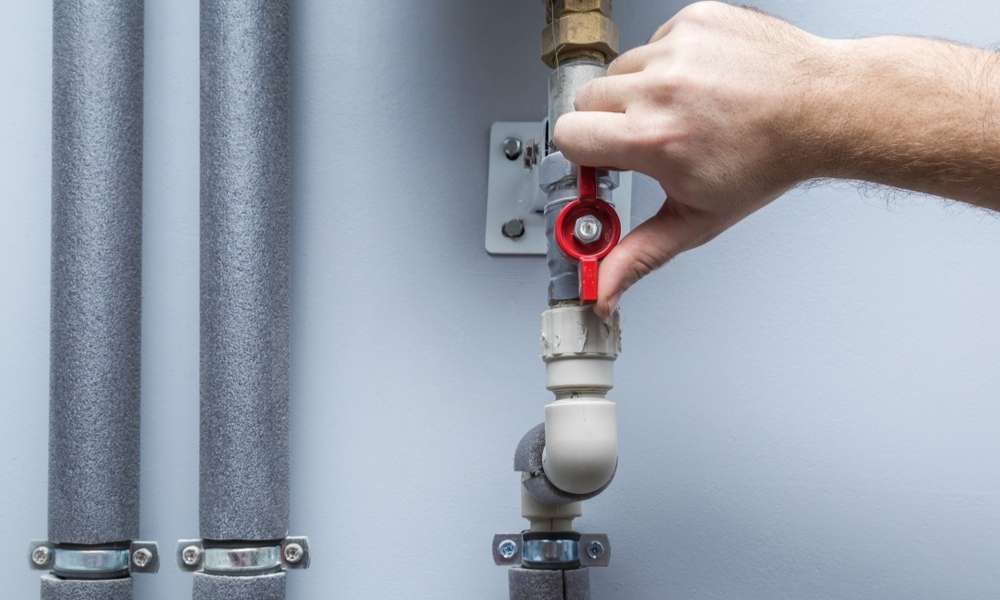
Turn off the kitchen water supply by turning off the valve that supplies water to the faucet. This is typically under the sink. If you cannot find the valve, turn off the main water valve for the house.
Remove the old faucet by unscrewing it from the sink. There may be some plumber’s tape around the base of the faucet – this needs to be removed before unscrewing it.
Underneath where the old faucet was, there will likely be a metal plate with screw holes in it – this is called a deck plate. Remove any screws that hold it in place and set it aside.
How To Stop Water Supply
Water bills can be expensive, and there are ways to conserve water and stop the flow of water without completely turning off the valve. One way is to replace the kitchen faucet with a newer model that has a more efficient flow rate. The average American uses between 10-12 gallons of water per day in the home, but by installing a new, low-flow faucet you can reduce that number by up to 70%.
Different types of kitchen faucets are on the market these days, so it’s important to do your research before buying one. There are single handle and dual handle models, pullout sprayers and side sprayers. Some have automatic sensors that turn off the kitchen water when not in use, while others have pause buttons that allow you to conserve water while you’re doing dishes or filling a pot. How to Change Kitchen Faucet.
Remove Old Kitchen Faucet
When it’s time to replace a kitchen faucet, removing the old one can be a challenge. If the faucet has been in place for many years, the water lines and connectors may be corroded and difficult to remove. The following instructions will help you remove an old kitchen faucet quickly and easily.
- Shut off the kitchen water supply to the kitchen faucet by turning off the valve.
- Disconnect the hoses from the faucet by unscrewing them counterclockwise.
- If the connectors are corroded, use a pair of pliers to loose them.
- Unscrew the mounting nuts at the top of the faucet with a wrench.
- Gently pull out the faucet and disconnect it from the sink spout.
Remove An Old Kitchen Faucet
Removing an old faucet is a straightforward process that can be completed in about 15 minutes. The first step is to turn off the kitchen water supply to the faucet by turning the valve located under the sink. Next, use a wrench to lose the nuts that secure the faucet to the sink. Be careful not to scratch the sink with the wrench. Lift the faucet off of the sink and disconnect the water supply lines. The old faucet can now be replaced with a new one by following these same steps in reverse.
Install New Kitchen Faucet
Replacing a faucet is a moderately easy home improvement project that can be completed in less than an hour, even for a beginner. The first step is to identify the type of faucet you have and purchase the corresponding replacement. Different types of faucets are on the market, so it is important to get the right one.
Once you have the new faucet, turn off the kitchen water supply to the sink and disconnect the hoses from the faucet. Next, remove the screws that hold the old faucet in place and carefully pull it out of the sink. Install a new faucet by reversing these steps. Be sure to test it before you finalize your work by running water through it for a few minutes.
How to install a new kitchen faucet
Installing a kitchen faucet may seem like a daunting task, but it’s really not that difficult. Here are the steps you need to take:
- Turn off the kitchen water supply to the faucet by closing the valve.
- If the new faucet doesn’t come with a supply line, you’ll need to purchase one at your local hardware store. Cut the line to length and attach it to the faucet using compression fittings. Tighten the fittings with pliers.
- Thread the new faucet into place on top of the sink and tighten it with a wrench.
- 5. Open the water supply valve and check for leaks.
Tips and tricks
Replacing a faucet is a relatively easy job that can be completed in about an hour. Here are some tips to help make the process go smoothly:
- Shut off the kitchen water supply to the valve.
- If needed, use a pipe wrench to lose nuts that hold the faucet in place.
- Install the new faucet by following the same steps in reverse order. Be sure to tighten the nuts securely so that there is no leakage.
- Turn on the water supply and check for leaks.
Conclusion
The steps for replacing a kitchen faucet are pretty simple. You will need to remove the old faucet by unscrewing the mounting nuts, disconnecting the water supply lines, and removing the escutcheon plate.
Next, you will need to install the new faucet by reversing these steps. Be sure to connect the water supply lines properly and tighten all of the mounting nuts securely. Finally, reattach the escutcheon plate.
If you are not comfortable doing this job yourself, you can always hire a professional to do it for you.


